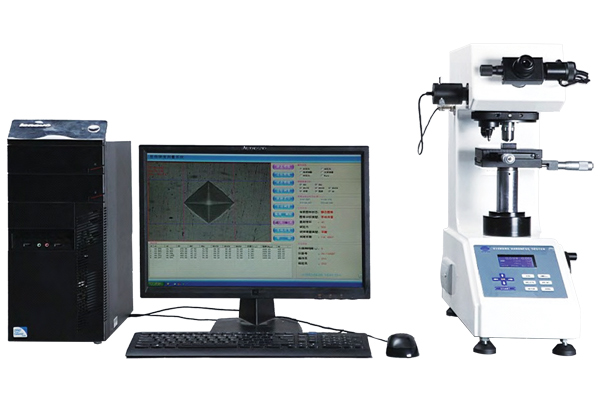
Main Features
- With Vickers hardness and Knoop hardness testing capabilities, and testing force can be extended to 2KG.
- The testing data able to be printed directly by the built-in printer.
- Can be connected with computer, used the image analysis software to analyzing the physical and chemical properties of the material.
- Testing method, testing power and duration time can be displayed directly on the LCD screen. The hardness value can be displayed directly by entering the indentation diagonal length and avoid the complication of the look-up table.
- According to different visual habits of the operators, the strength of the light source can be adjusted.To avoid the visual fatigue for long time operation.
- The independent research and development of lifting system and positioning system, ensured the accuracy and repeatedly of the testing process.
- The optical system designed by senior optical engineer not only meet the definition of hardness testing requirements, but also can observe the microstructure of the material.
- Reserved image channel,can be connected with computer, used the image analysis software to analyzing the physical and chemical properties of the material.
Technical Specification
| Models | METLAB – 1000 |
| Testing Force | 10g (0.098N)、25g (0.245N)、50g (0.49N)、100g (0.98N )、200g (1.96N)、300g (2.94N)、500g (4.9N)、1000g (9.8N) |
| Scale | HV0.01、HV0.025、HV0.05、HV0.1、HV0.2、HV0.3、HV0.5、HV1、HV2 |
| Conversion Scale | HRA,HRB,HRC,HRD, HK,HBS,H15N,H30N,H45N,H15T,H30T,H45T |
| Min. Measuring Unit | 0.01μm |
| Hardness Value Range | 1HV-4000HV |
| Hardness Value of Reading | Digital LCD Screen |
| Total Magnification of Microscope | 100X(For Observation)、400X(For Measurement) (Can be extended to 200X or 600X) |
| Loading Method | Automatically(Load, dwell and unload the testing force) |
| Duration Time | 1-99s Auto / Manual Turret |
| Switch Type of Objective lens and Indenter | |
| Specimen Allowing Maximum Height | 85mm |
| Distance from Indenter Center to Fuselage | 120mm |
| Overall Dimension | 490×185×515mm(L×W×H) |
| Net Weight | 45kg |
| Light Source | LED Cold light source (can be continuous use for 24 hours, servicing life can reach 100,000 hours) |
| Power Supply | 110V/220V + 5%, 50/60 Hz |
| X–Y Testing Table | Dim.:100×100 mm,Max. Travel Range: 25×25mm,Moving Resolution Ratio: 0.01mm(X-Y Digital Testing Table with digital LCD Screen for Optional ) |
| Data Output | Built-in Printer(Hardness Value, The Max. And Min. Value, Testing times and Average Value)Built-in RS-232 interface |
| Standard Accessories | 1 piece:
10X digital micro eyepiece ; 10X and 40X objective lens; Vickers indenter; X-Y Testing Table; Flat Fixture; Small Parts Fixture; Water level; Power line; Dust cover; Instruction Book; Hardness Conversion Tables; Accessory case 2 pieces: Standard block of hardness 4 pieces: horizontal adjusting screw |
| Optional Purchase Accessories | Image analysis software; Metallographic structure equipment; Noop Indentor; Knoop hardness block; 15X micrometer eyepiece; 2.5X Objective lens; 20X Objective lens; 60X Objective lens |

